10 Winter-Inspired Crafts for Kids — The Baby Cubby
Winter can sometimes be a hard season to love–it’s cold, sickness is everywhere, and it can feel like there’s not a lot you can do when the weather is bad. But there is one group of people in particular who don’t care about all that: our kids! They absolutely love this season! From jumping in puddles to sledding and so much more that winter brings, winter can be a magical season for a child! I love having my kids make crafts that relate to each season. So whether you need something to occupy your little one while you’re waiting out the storm, or if your kids just want to make an adorable craft, we’ve gathered ten winter-inspired crafts that your kids will truly melt for!
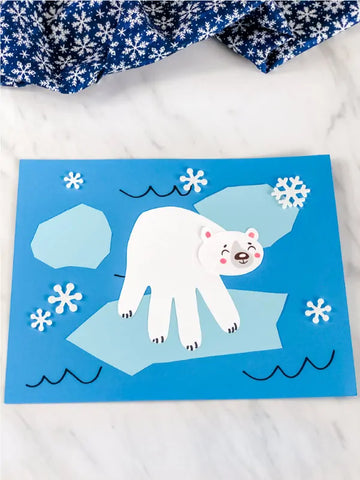
1. Polar Bear Craft
Supplies:
Construction paper (white, light blue, and dark blue)
Black and pink markers
Glue stick
Scissors
Snowflake or tree stickers (optional)
Instructions:
Help your child trace one of their hands on the white piece of paper to make the polar bear’s body. Then cut it out and set it aside.
Next, cut a small oval using the rest of your white piece of paper to make the polar bear’s face. Don’t forget to add some white ears to your oval piece. You can also use this template for the face.
Grabbing your pink marker, draw the polar bear’s inner ears and cheeks. Then use your black marker to draw the polar bear’s eyes, nose, smile, and, of course, their tiny claws.
Now cut out the icebergs from your light blue construction paper, including one for your polar bear to stand on.
Glue your icebergs onto the dark blue paper.
Now flip the white handprint piece upside down, making sure that the fingers are facing down, and glue it to the iceberg.
Attach the head piece to the top left of the polar bear’s body (the thumb of the hand cutout).
To create a water scene, use the black marker to draw some waves.
Add anything else you want to create fun scenery, and you’re finished!
From simpleeverydaymom.com
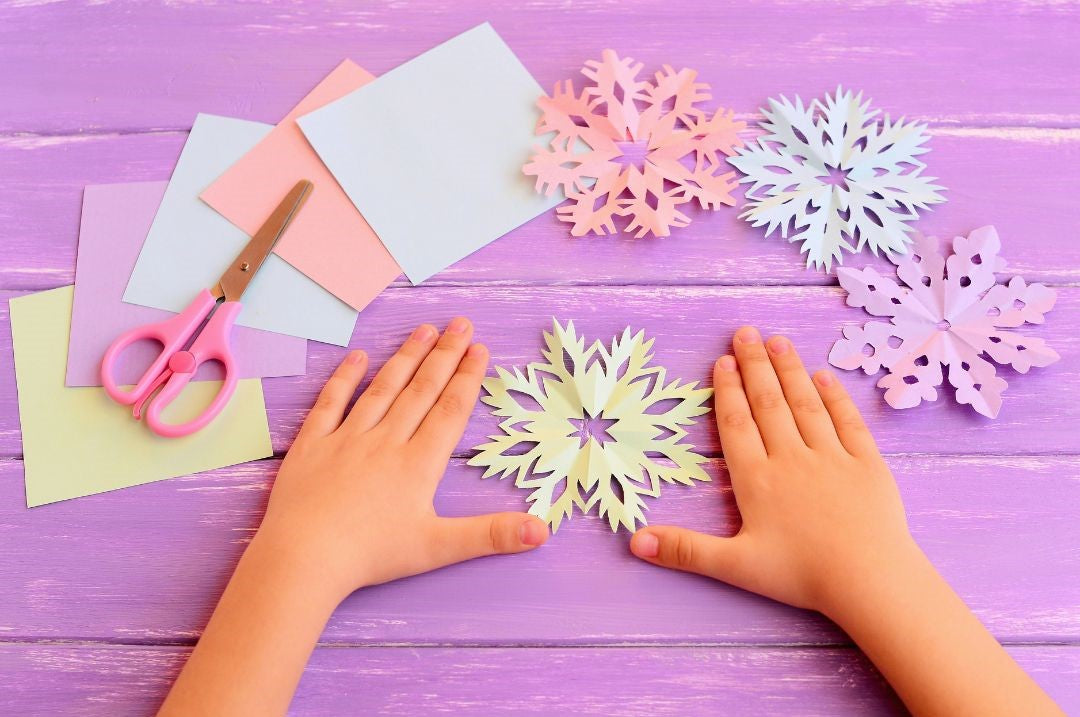
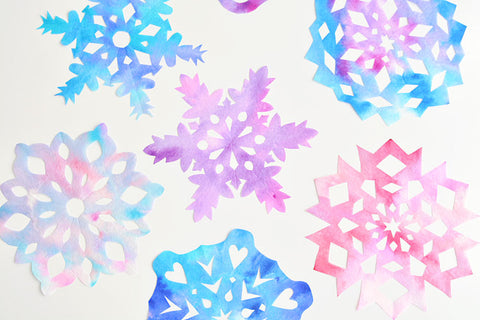
2. Coffee Filter Snowflakes
Supplies:
Coffee filter (any size)
Spray bottle filled with water
Washable markers
Scissors
Paper clips
Instructions:
Start by flattening the coffee filter and drawing on it with your markers. Try to fill in as much white space as you can.
Now place your coffee filter onto a plate or cardboard piece and mist it with your spray bottle. Once it is completely wet, you will see the colors start to blend and blur. If you spin the filter around, the colors will move and it is cool to watch!
Let it dry completely (this can take up to a couple of hours).
Now it’s time to cut it out. Fold the filter in half, then in half again. You can even fold it a third time if you want. Now cut little shapes out of the filter, being careful to not cut it completely in half. You can use your paper clip to help secure it so it doesn’t unfold.
Unfold your filter and you’ll have a beautiful, colorful snowflake you can display anywhere!
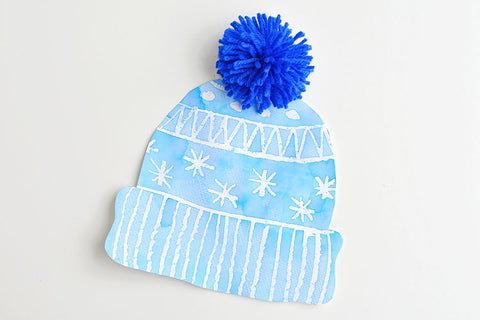
3. Winter Hat Art
Supplies:
White crayon
White piece of paper
Watercolor paint
Colored yarn
Instructions:
You can either draw a winter hat yourself or you can use this template to start the craft.
Once you’ve got your hat drawn, use your white crayon to decorate it with swirls, snowflakes, stripes, or however they want!
Now this is the fun part–watch the magic happen next! Use the watercolor paint to paint the hat, and watch as the white crayon lines appear among the paint.
If you feel like you’ve used too much paint or want to speed up the drying process, grab a paper towel and place it on top of your work for one minute. Now let your hat fully dry for one hour.
Once dry, cut out your winter hat.
You can either buy a pom pom or make it yourself. Once you have that ready, glue it to the top of the hat!
All done!
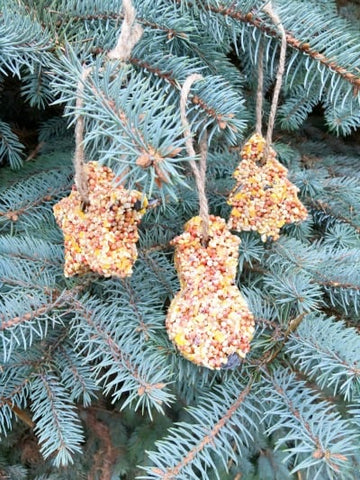
4. Cookie Cutter Bird Feeder
Supplies:
Winter-inspired cookie cutter
3/4 cup bird seed
1 packet of unflavored gelatin
String
Parchment paper
Straw
1/4 cup of water
Instructions:
Start by bringing 1/4 cup of water to a boil on medium heat.
Add your packet of unflavored gelatin to the boiling water, stirring 1-2 minutes until fully dissolved.
Take off heat and let it sit for a couple of minutes.
Stir in bird seed.
Place cookie cutters on a piece of parchment paper.
Next, pour your bird seed mix into your cookie cutters, pressing the seeds down.
Now stick your straw into each of your bird seed molds, near the top. This will create the hole for your string.
Place your birdseed cookie feeder in the freezer for 20 minutes to harden.
Take them out of the freezer and let them sit at room temperature for 10 minutes.
Carefully remove the bird seed feeders out of the cookie cutter molds and put your string through the hole, tying to create a loop.
Now all you have to do is find a tree to hand your handmade feeder.
This is such a fun craft! My kids loved watching as their little feathery friends would feed on these cute cutouts!
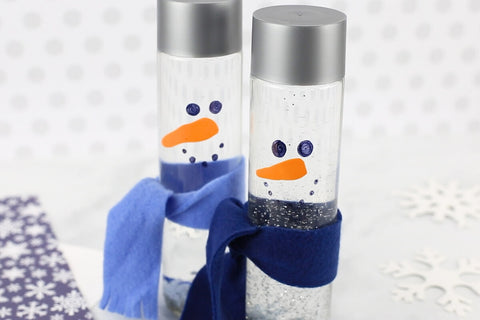
5. Winter Sensory Bottles
Supplies:
Water bottle
Clear glue
Glitter
Snowflake beads
Pom poms
Sequins
Super glue
Permanent markers (optional)
Colorful cardstock paper (optional)
Scrap of fabric (optional)
Ingredients
Fill your water bottle 3/4 of the way full and add 1/2 a bottle of clear glue.
Add all your fun stuff to the liquid: glitter, sequins, beads, and other sparkly goodies.
Super glue the lid closed so there’s no chance of water spilling out.
If you want, you can also cut out a snowman nose, eyes, and mouth that to turn your water bottle into a snowman. You can even add a little scarf with your fabric scrap.
This craft is so easy, and it will keep your kids will be entertained for awhile!
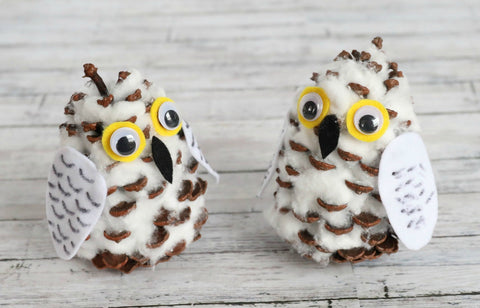
6. Pine Cone Owl
Supplies:
Pine cone
2 googly eyes
Black, white, and yellow felt
Scissors
Liquid/hot glue
Black Sharpie marker
Cotton balls
Instructions:
To start, find yourself a decently sized pine cone–not huge, but not tiny either.
Tear your cotton balls into small pieces.
Place your fluffy cotton pieces in between and around each scale of your pine cone–no need to add glue here because stuffing it in between scales will help hold them in place.
Now it’s time to start creating your owl pieces. Cut out two circles from the yellow felt for the eyes, and two ovals from the white felt to create the wings. Cut out a small pointed oval from the black felt for the the owl’s beak.
Draw a pattern/line/scallops on the wing pieces to create the look of feathers.
Glue your googly eyes to your yellow felt eye pieces.
Lastly, glue your owl’s eyes, beak, and wings to your pine cone;
There you have it–a fluffy white winter owl!
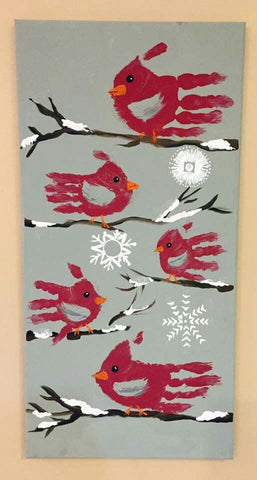
7. Cardinal Bird Hand Painting
Supplies:
Blue construction paper
Red, black, orange, white, and brown paint
Several paintbrushes
This craft is quite simple, but it can get a little messy, so you may want to keep some paper towels on hand.
Instructions:
First have your child paint tree branches on the construction paper. They can add some white snow on them to create a cute wintery scene.
Here comes the fun part for them: with your red paint, paint their hand and carefully press it onto the branch, making sure their hand is placed sideways.
Add as many cardinal hand stamps as you want.
Allow a couple of minutes for the paint to dry.
Paint a black eye, orange beak, and legs on the bird, and a color of their choosing for their side feather.
Paint some snowflakes falling to create a wintery background.
Let dry and there you have it, a cardinal masterpiece.
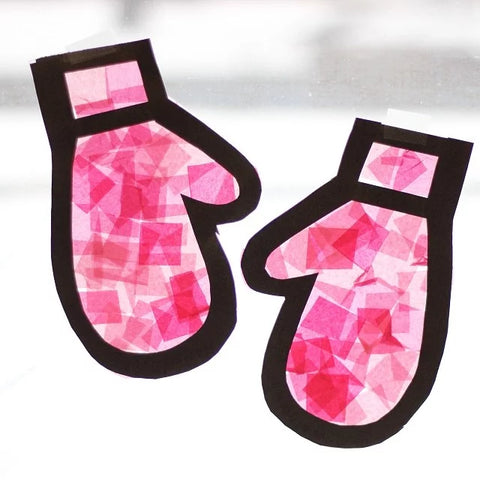
8. Stained Glass Mittens
Supplies:
Colorful tissue paper cut into small squares
2 sheets of 12 x 18 clear contact paper
Black construction paper
Scissors
Instructions:
Start by peeling the sheets of contact paper and placing one sheet sticky-side-up on your table.
Next, make two thick mitten outlines with your black construction paper. You can use this template.
Lay the mittens on the contact paper and then decorate the inside portions by sticking the tissue paper pieces on.
Once fully decorated, lay another piece of clear contact paper (sticky side down) on top of your mittens.
Trim the excess contact paper around mittens and you’re done.
Hang it up by a window to see the beautiful colors show! It’s so pretty!
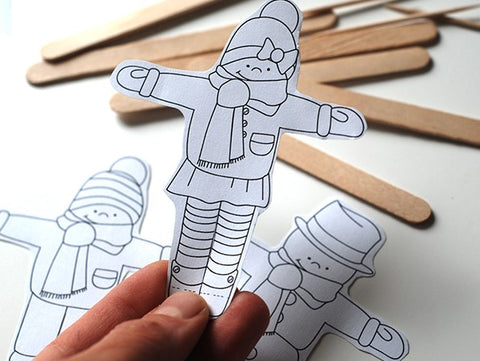
9. Popsicle Stick Skier
Supplies:
Popsicle sticks
Toothpicks
Skier template
Crayons
Glue
This is a craft that takes barely any time so let’s get started.
Instructions:
Using this template, cut out and color your skier.
Glue their feet to your two popsicle sticks.
Next, wrap their hands around their toothpicks (for their skiing poles) and there you have it! They are ready for adventure!
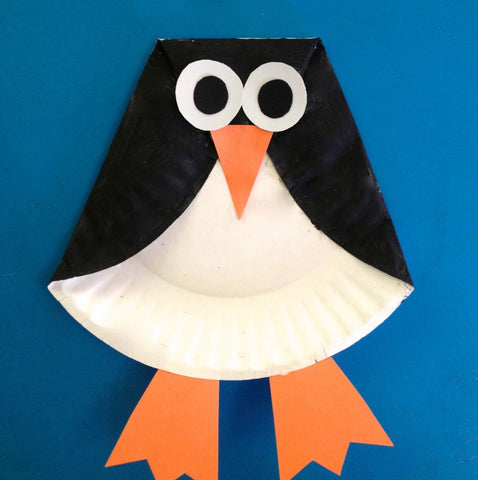
10. Paper Plate Penguin
Supplies:
Paper plate
Black paint
Paintbrush
Glue
Orange, black, and white construction paper
Instructions:
Begin by folding in the sides of the paper plate and folding down the top to create a triangular shape with a flat top. Glue the folded sections in place.
Next, paint the folded area black. This will be the head and wings of your cute penguin.
Let dry for an hour.
Once dry, cut the beak and feet out of your orange paper and glue those into place.
Next, cut out eyes and glue them on the face.
That’s it! Your kid will love their arctic friend!
It can be hard to love wintertime, but remember it won’t last forever, and doing these crafts with your kid will make it more enjoyable for them and create wonderful memories at the same time!
Put your own spin on things, or even come up with some fun winter crafts yourself, and your kiddos will love those as well!
See more winter-themed crafts on these adorable blogs, and be sure to share with us if you’ve ended up doing any of these! Stay warm and happy crafting!


You May Also Like
Rethinking Early Childhood Education
Baby Animals: A Touch and Feel Book – Children’s Board Book – Educational